Thursday, April 24, 2014

Kitchen Art

I had so much fun painting with these 3 little artists!   The oldest of this crew is almost 7 so mom knew to choose out simple images for their abilities.  We worked with two canvases and created 2 "small child" creations with these three sweeties.   Mom is an amazing cook and baker so I love that she chose to have them paint something for her kitchen! 

For step one, little "N" and "L" came over to paint the canvas background.  We started with two paint colors and worked on going up and down with our brushes to cover the whole piece with paint and mix as we go.  Mom stayed to help with "N", who, by the way, may rule the world one day.   Don't get me wrong though, we would all want her to!  She is adorable!

  I love these two pics, mom helping "N" with the brush strokes while "N" talks to the camera, and then "N" checkin' out because those sides...just tiring!   Thanks mom!  ha!  "L" was still going strong though!


After a little break to let the paint dry, "L" came back to create a distressed look on both canvases with a kitchen scrub and light paint.   He pulled the scrub down and filled the canvas with this lighter shade.  He did great!  Especially given the fact he does not like to get dirty and this technique is totally grimy!   I think the first photo here captures his true emotions regarding the experience!   Truly though, he was such a great sport and so happy and sweet!


Wa LA!
The "yucky hands" pictures!    Awesome!

After spending the morning with these 2, I must say that this momma must love her life!  They are the sweetest!  Their personalities are adorable and so are they!  Great job "N" and "L"!


Session 2!   Big bro "J" came over after school to work on the details of the painting.  First up was the tree trunk.  He worked so carefully to stay in the lines and listened well on to how to use the brush.  Very good!  You can see his concentration in these snap shots!


 Some dot to dot connections for those branches!


And then final fill ins!  You can also see my first layer of lettering for the prayer we chose out here too.Now "J" moved onto the leaves, first with a dark shade and then veins in a lighter shade.  We talked about the shape of the veins and then he created them on his own!


 Also a little bird in the tree and red berries put in with a q-tip!


 And finally a hand stamp on the other canvas!  "J" you were great!   Such a good listener!   Now he was off to play with his buddy, my son, who was anxiously awaiting the end of his session.   Enjoy your afternoon!


 "L" and "N" came with mom for pick up and signed the painting, and hand printed as well!


 Then we took a photo op with the NEAR completed project!   Their parts were finished, now I needed to complete their lettering.   GREAT work little artists!  What a special painting for the family to see whenever you are gathered in the kitchen!  


Nice and silly!


 And here is the final project with the lettering painted in!  Lovely!


Tuesday, April 15, 2014

Abstract Beauty

"P" has painted two beautiful paintings with me and in both cases, Grandma has hung each one up on her own mantle before it gets moved permanently to "P's" home.  So it was time for Grandma to have her own painting to keep.  It was so good to see this girl again!  This was a fun project to work on together and the result was simply awesome!   

For this project, "P" was going for an abstract creation, which was wonderful, because she got to do the sketching on this project too!  I had an inspiration image to use that had 3 square canvases with a fluid design going over all 3 which created one image.   We were going to use similar shapes to create the fluid look on one large canvas.  Grandma also provided her couch pillow case which was SO helpful for matching up colors for the painting!  Thanks so much for that!   
Color inspiration
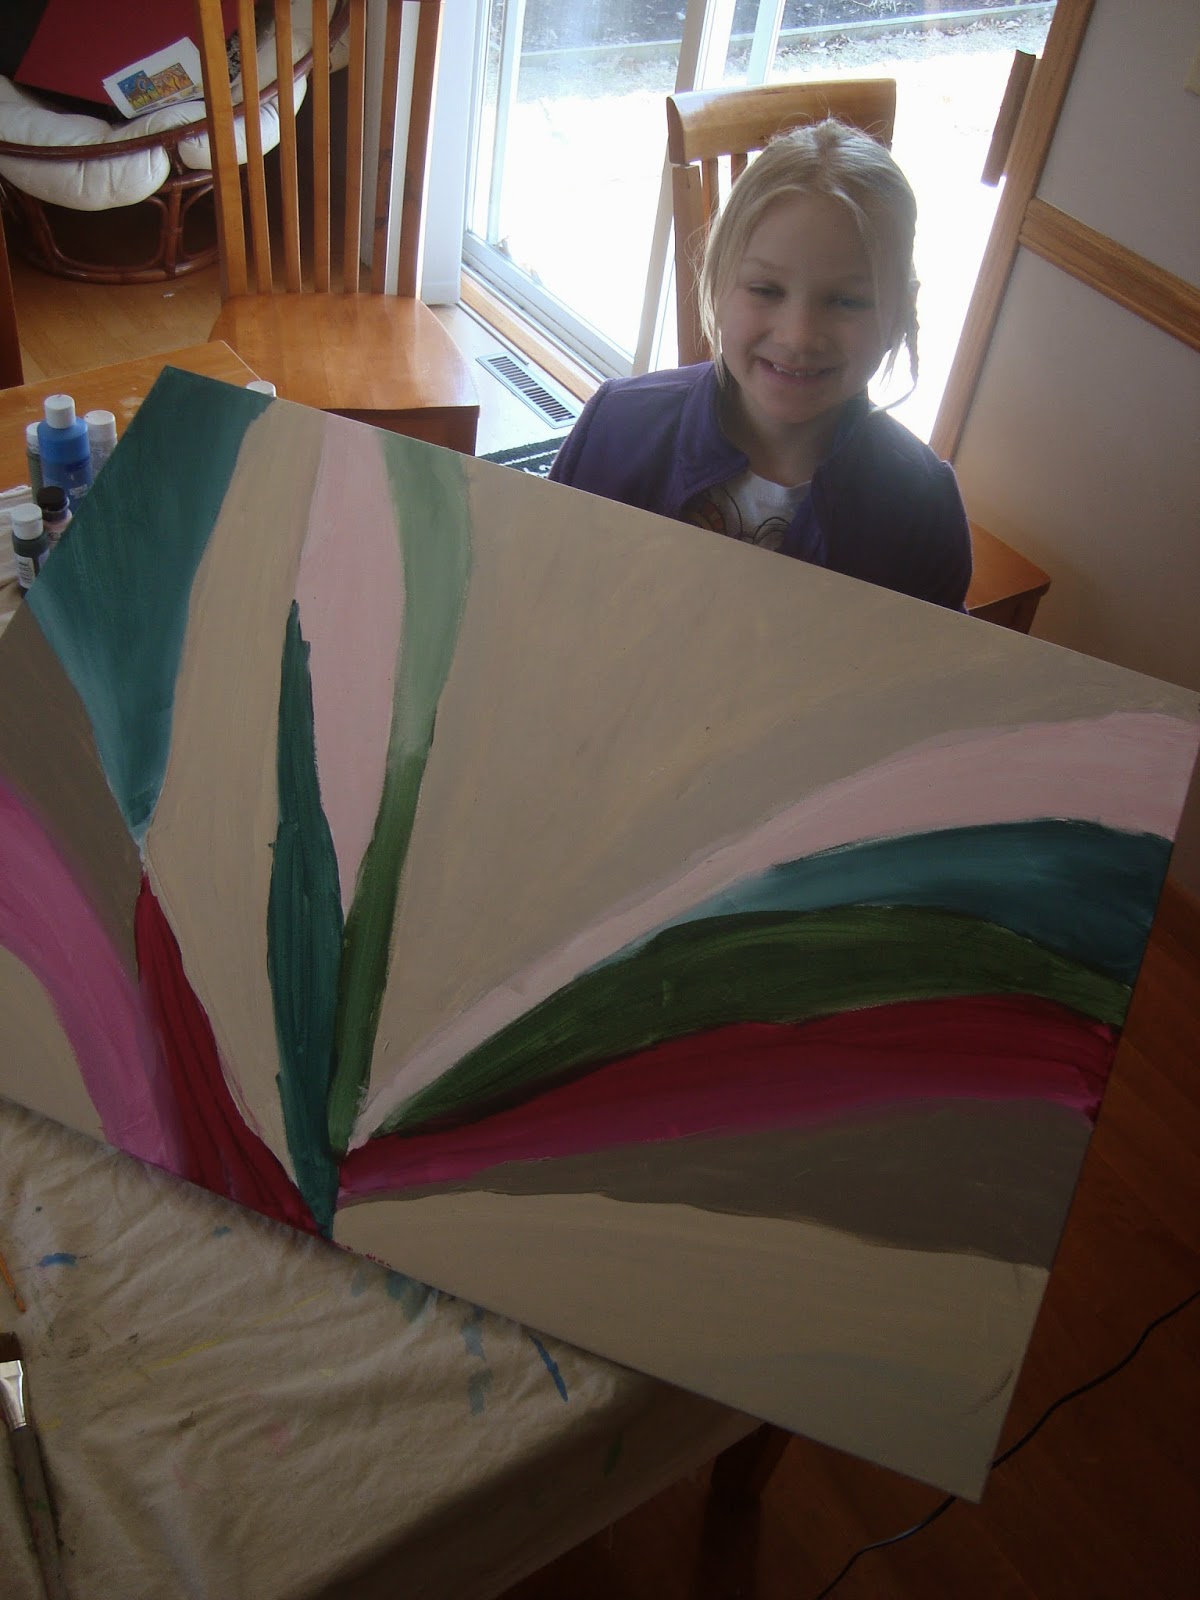
To begin, we talked about what type of lines we wanted to create on the painting and where they would go. Then "P" drew them in, coming to a point in the middle of the painting.   Once she completed the sketches, she filled in a neutral base color in the remaining 3 areas using long, smooth brush strokes.

Next, I mixed up the blue/green shade and "P" chose out the areas she wanted to paint it in.   She had complete ownership with the location of colors of this painting and once again completely impressed me with her decisions.  She used white to blend into the color to create a beautiful, gradual tint.


Examining her blending!
Next up was a burgundy and rose shade (which she also tinted with white) and then a solid gray color.  She was adamant about not wanting the same color to touch at any point. :)  Doesn't her blending look great!


Some forest green with white....


Today I didn't really worry about her lines when she was next to different colors.  The goal was to get all the base colors in.  Her final shades where this light pink and we also created a dusty rose with the burgundy and white which she LOVED!   She told me she doesn't really like pink that much anymore, but, "I love that color on the painting!"  Agreed.


Adding a gray tone in the middle...


And today was a wrap!   "P" created great sketches and a wonderful composition today!   Colors in and drying until our detail session the following week!
Session 2:  
Today my goal for "P" was to add another layer of paint to some her spaces and smooth out brush strokes from last week.   This week I used painter's tape so that she could use thick paint and neither of us had to be concerned with the brush going into places we didn't want it.  It was a bit time consuming but totally worth it. Also, I was taking off the tape at first until I saw how much "P" was interested in taking it off!  Duh!   Of course!   Ripping that tape off and seeing a clean line...there is something very rewarding about it!   You can see in the photos below how often we used it for these second coats!  


Filling in a new middle arch with that FAVE rose color!


After those smooth second coats were on, "P" asked if she could start the final step, which was creating black outlines with paint and a gel medium.   I had her practice on an old canvas to get the hang of it, and then let her start adding them in on her painting!

Practice...

And the real deal!  It seemed to help if I drew in pencil for her to trace, so that's what we did today.  It is no easy task to paint straight lines, especially with a paint that has a thickener added to it.  I was very impressed!


And our wrap for today!   Next session would be purely lines, lines, and more lines!


Session 3:

Today "P" was going to finish her black lines.   We worked for an hour, which was funny because after about 45 min. she asked how long we had been working on the lines, and when I told her, she said, "Really, it felt like 5 min.!"   Time flies when you are having fun!  

I had her add in 2 arches to the painting.  I had these two arches taped off for her to start, simply because they were very big, and since it went through the whole painting, having the arches especially smooth would be very important for the whole composition.   Her she is working on arch 1.


 And reaching over to start arch 2!

 For the rest of the lines we used pencil lines, or dots (seen here) to help create fluid lines.  Look at her go!

And, of course, a FAVORITE part!  Do you blame us!

 Because the painting was so big, it was easier for her to have it upright, so I would hold it while she painted in the line.  Such a steady hand!


After she finished, we went back to the first set of black lines she created in session 2 and thickened them up in some spots.  Then, this masterpiece was complete.  AND BEAUTIFUL!  

 Definitely mantle worthy!   I'm so glad Grandma has a painting to keep permanently at her place!   Loved painting with you "P"!    Once again, fun sessions and a GREAT RESULT!